Guidelines
Weasis Plugin Development
This page describes the necessary configurations to be able to debug Weasis using an IDE. For developers who want to create new plugins, you can visit How to build and install a plugin.
We recommend the use of IntelliJ IDEA because the following instructions are based on it. Nevertheless, it is possible to use other IDEs by configuring weasis-launcher with similar instructions described in Add a launcher.
Prerequisites
- Install IntelliJ IDEA (Community or Ultimate Edition 2024.3 or higher)
- Use JDK 25 or higher and set the language level to
SDK Defaultin File > Project Structure… >.
Required Maven version is 3.8.1 or higher. - In File > Settings… > Plugins install google-java-format plugin from Marketplace and enable it from google-java-format Settings
Code style and convention
Weasis uses google-java-format as coding conventions. The format can be applied by Maven through the Spotless plugin or from the IDE (by importing the IntelliJ Java Google Style file). Formatting code with an IDE is not 100% compatible with Spotless, so it is better to use the latter before submitting new commits. This guarantees identical code formatting regardless of the system or code editor used.
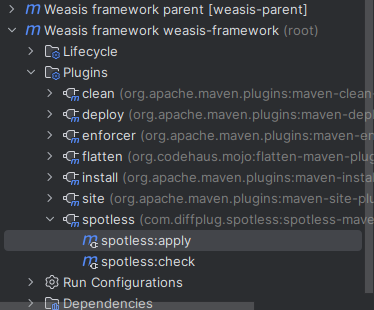
- From Maven command:
mvn spotless:apply - From the Maven panel
Getting the source and building Weasis
- Getting the Source
- For an external Git client, see Building Weasis.
- From IntelliJ IDEA: New > Project from Version Control…
- In the Get from Version Control dialog, select the menu Repository URL and enter the following URL:
https://github.com/nroduit/Weasis.git(public repository)
- In the Get from Version Control dialog, select the menu Repository URL and enter the following URL:
- Building Weasis plugins
- In the maven panel, select clean/install in Lifecycle of weasis-framework (root) to compile and to install all the plugins in the local Maven repository.
Tip
- It is possible to use a JVM Option (e.g.
-Dweasis.arch=linux-x86-64) to limit the build of native plugins only to the architecture of the current system (do not use this option when building the distribution). - See also building the final Weasis Distributions
Add a launcher
For running or debugging Weasis, you need to create a launcher:
-
Open Run > Edit Configurations…
-
Create a new Application
- Select weasis-launcher as a module (field starting by -cp)
- Main Class: browse org.weasis.launcher.AppLauncher
- Click on Modify Options
- Select Add dependencies with “Provided” scope to classpath
- Select Do not build before run
- Select Add VM Options and enter
-Xms64m -Xmx768m -Dgosh.port=17179
- Working Directory: remove the current value and add %MODULE_WORKING_DIR% from the Insert Macros button

Note
As the default build task has been removed it is necessary to apply the Maven command install on modules with modified code before launching the Run or Debug mode.
Keeping the build task and delegating the build to Maven does not seem configurable for a multi-module project, see this issue.
-
Examples of launching parameters by entering values in the Program arguments text box
- Loading DICOM files from a local path:
Note
Some command interpreters need to escape the quotes or double quotes required for paths or URLs. This is the case with IntelliJ IDEA or Eclipse.
For more commands at startup see also Weasis commands.Warning
In Eclipse launcher parameters, ‘&’ within URLs needs to be escaped with a backslash.
- Loading DICOM files from a local path:
-
Examples of other VM options for overriding the default Preferences
- Removing the possibility of exporting DICOM:
-Dweasis.export.dicom=false - Defines a new user (for getting specific preferences):
-Dweasis.user=user1 - Examples with specific configuration files:
- For launching Weasis Dicomizer:
-Dfelix.extended.config.properties=file:target/conf/dicomizer.json - Configuration from a URL:
-Dfelix.extended.config.properties=https://mysite.com/weasis/conf/config.jsonNote
felix.config.properties defines the location of base.json (the OSGI configuration and the list of plugins to install/start)
felix.extended.config.properties defines the location of a json file (extends/overrides base.json)
- For launching Weasis Dicomizer:
- Removing the possibility of exporting DICOM: