Getting Started

Try Weasis now

Visit the Download Page for a comprehensive list of installation options adapted to your system.

Since version 4, only the distribution with a native installer is maintained to ensure a better user experience in terms of installation, configuration and compatibility. This distribution also supports launching Weasis from a web context via the weasis protocol.

Download Weasis DICOM Viewer binaries
Pack. System Arch. Size Weasis installer Comments
DEB  Linux x86-64 49.9 MB weasis_4.5.1-1_amd64.deb Requires GLIBC_2.17
DEB  Linux arm-64 47.2 MB weasis_4.5.1-1_arm64.deb Requires GLIBC_2.27
DEB  Linux arm-32 50.5 MB weasis_4.5.1-1_armhf.deb Requires GLIBC_2.17. Only tested with Raspberry Pi 4
MSI  Windows x86-64 47.7 MB Weasis-4.5.1-x86-64.msi Requires Windows 10 or higher
PKG  macOS arm-64 57.7 MB Weasis-4.5.1-aarch64.pkg Requires macOS 12 or higher (Apple Silicon)
PKG  macOS x86-64 60.1 MB Weasis-4.5.1-x86-64.pkg Requires macOS 11 or higher
RPM  Linux x86-64 63.3 MB weasis-4.5.1-1.x86_64.rpm Requires GLIBC_2.17, libstdc++.so.6 and libgcc

For details about GLIBC versions and Linux distribution compatibility, see this page.

Note

To manage Weasis version at the server side, it is possible to install the Weasis web package which will upgrade the native installation at the client side (it works for minor releases by updating all the plugins except the launcher).
Explore more integration possibilities with other systems here.

Tip

Stay informed about new releases and updates by joining our Google Group. Choose “Email” to get updates directly to your inbox.

General Topics

Get started with these links to learn more about Weasis and its features:

Developer Documentation

Dive into advanced topics and technical resources for developers:

Subsections of Getting Started

Download Weasis DICOM Viewer

Package management systems

Get automatic updates for Weasis by installing it via these package management systems:

Windows

macOS

Linux

Warning

The package management systems above can limit certain functionalities because they work in sandbox mode, especially for Flatpak (see Fedora issue) and Snap (see removable media issue).

The Snap package installation uses a <user.home>/snap/weasis/current/.weasis directory instead of the <user.home>/.weasis directory for all other installations.

List of All Installers

All the packages can be found on Github Github Github and the legacy repository Sourceforge Sourceforge Sourceforge

For details about GLIBC versions and Linux distribution compatibility, see this page.

Download Weasis DICOM Viewer binaries
Pack. System Arch. Size Weasis installer Comments
 
v4.5.1 publised on Sep 18, 2024 Github v4.5.1 downloads
DEB  Linux x86-64 49.9 MB weasis_4.5.1-1_amd64.deb Requires GLIBC_2.17
DEB  Linux arm-64 47.2 MB weasis_4.5.1-1_arm64.deb Requires GLIBC_2.27
DEB  Linux arm-32 50.5 MB weasis_4.5.1-1_armhf.deb Requires GLIBC_2.17. Only tested with Raspberry Pi 4
MSI  Windows x86-64 47.7 MB Weasis-4.5.1-x86-64.msi Requires Windows 10 or higher
PKG  macOS arm-64 57.7 MB Weasis-4.5.1-aarch64.pkg Requires macOS 12 or higher (Apple Silicon)
PKG  macOS x86-64 60.1 MB Weasis-4.5.1-x86-64.pkg Requires macOS 11 or higher
RPM  Linux x86-64 63.3 MB weasis-4.5.1-1.x86_64.rpm Requires GLIBC_2.17, libstdc++.so.6 and libgcc
 
v4.5.0 publised on Aug 15, 2024 Github v4.5.0 downloads
DEB  Linux x86-64 49.9 MB weasis_4.5.0-1_amd64.deb
DEB  Linux arm-64 47.2 MB weasis_4.5.0-1_arm64.deb
DEB  Linux arm-32 50.5 MB weasis_4.5.0-1_armhf.deb
MSI  Windows x86-64 47.7 MB Weasis-4.5.0-x86-64.msi
PKG  macOS arm-64 57.8 MB Weasis-4.5.0-aarch64.pkg
PKG  macOS x86-64 60.2 MB Weasis-4.5.0-x86-64.pkg
RPM  Linux x86-64 63.3 MB weasis-4.5.0-1.x86_64.rpm
 
v4.4.0 publised on May 6, 2024 Github v4.4.0 downloads
DEB  Linux x86-64 50.4 MB weasis_4.4.0-1_amd64.deb
DEB  Linux arm-64 47.4 MB weasis_4.4.0-1_arm64.deb
DEB  Linux arm-32 50.7 MB weasis_4.4.0-1_armhf.deb
MSI  Windows x86-64 47.8 MB Weasis-4.4.0-x86-64.msi
PKG  macOS arm-64 58.4 MB Weasis-4.4.0-aarch64.pkg
PKG  macOS x86-64 60.8 MB Weasis-4.4.0-x86-64.pkg
RPM  Linux x86-64 64.3 MB weasis-4.4.0-1.x86_64.rpm
 
v4.3.0 publised on Feb 17, 2024 Github v4.3.0 downloads
DEB  Linux x86-64 49.5 MB weasis_4.3.0-1_amd64.deb
DEB  Linux arm-64 46.5 MB weasis_4.3.0-1_arm64.deb
DEB  Linux arm-32 47.6 MB weasis_4.3.0-1_armhf.deb
MSI  Windows x86-64 46.8 MB Weasis-4.3.0-x86-64.msi
PKG  macOS arm-64 57.4 MB Weasis-4.3.0-aarch64.pkg
PKG  macOS x86-64 59.9 MB Weasis-4.3.0-x86-64.pkg
RPM  Linux x86-64 63.5 MB weasis-4.3.0-1.x86_64.rpm
 
v4.2.1 publised on Nov 11, 2023 Github v4.2.1 downloads
DEB  Linux x86-64 49.0 MB weasis_4.2.1-1_amd64.deb
DEB  Linux arm-64 46.4 MB weasis_4.2.1-1_arm64.deb
DEB  Linux arm-32 47.5 MB weasis_4.2.1-1_armhf.deb
MSI  Windows x86-64 46.7 MB Weasis-4.2.1-x86-64.msi
PKG  macOS arm-64 57.2 MB Weasis-4.2.1-aarch64.pkg
PKG  macOS x86-64 59.7 MB Weasis-4.2.1-x86-64.pkg
RPM  Linux x86-64 62.9 MB weasis-4.2.1-1.x86_64.rpm
 
v4.2.0 publised on Aug 18, 2023 Github v4.2.0 downloads
DEB  Linux x86-64 50.5 MB weasis_4.2.0-1_amd64.deb
DEB  Linux arm-64 48.8 MB weasis_4.2.0-1_arm64.deb
DEB  Linux arm-32 50.0 MB weasis_4.2.0-1_armhf.deb
MSI  Windows x86-64 48.1 MB Weasis-4.2.0-x86-64.msi
PKG  macOS x86-64 61.2 MB Weasis-4.2.0-x86-64.pkg
RPM  Linux x86-64 62.7 MB weasis-4.2.0-1.x86_64.rpm
 
v4.1.2 publised on Jun 16, 2023 Github v4.1.2 downloads
DEB  Linux x86-64 48.7 MB weasis_4.1.2-1_amd64.deb
DEB  Linux arm-64 47.1 MB weasis_4.1.2-1_arm64.deb
DEB  Linux arm-32 48.6 MB weasis_4.1.2-1_armhf.deb
MSI  Windows x86-64 46.4 MB Weasis-4.1.2-x86-64.msi
PKG  macOS x86-64 58.8 MB Weasis-4.1.2-x86-64.pkg
RPM  Linux x86-64 61.6 MB weasis-4.1.2-1.x86_64.rpm
 
v4.1.1 publised on May 22, 2023 Github v4.1.1 downloads
DEB  Linux x86-64 48.7 MB weasis_4.1.1-1_amd64.deb
MSI  Windows x86-64 46.4 MB Weasis-4.1.1-x86-64.msi
PKG  macOS x86-64 58.8 MB Weasis-4.1.1-x86-64.pkg
RPM  Linux x86-64 61.6 MB weasis-4.1.1-1.x86_64.rpm
 
v4.1.0 publised on May 8, 2023 Github v4.1.0 downloads
DEB  Linux x86-64 48.7 MB weasis_4.1.0-1_amd64.deb
DEB  Linux arm-64 48.3 MB weasis_4.1.0-1_arm64.deb
DEB  Linux arm-32 48.6 MB weasis_4.1.0-1_armhf.deb
MSI  Windows x86-64 46.1 MB Weasis-4.1.0-x86-64.msi
PKG  macOS x86-64 58.8 MB Weasis-4.1.0-x86-64.pkg
RPM  Linux x86-64 61.7 MB weasis-4.1.0-1.x86_64.rpm
 
v4.0.3 publised on Nov 13, 2022 Github v4.0.3 downloads
DEB  Linux x86-64 41.0 MB weasis_4.0.3-1_amd64.deb
DEB  Linux arm-64 39.1 MB weasis_4.0.3-1_arm64.deb
DEB  Linux arm-32 38.9 MB weasis_4.0.3-1_armhf.deb
MSI  Windows x86-64 41.0 MB Weasis-4.0.3-x86-64.msi
PKG  macOS x86-64 53.4 MB Weasis-4.0.3-x86-64.pkg
RPM  Linux x86-64 56.4 MB weasis-4.0.3-1.x86_64.rpm
 
v4.0.2 publised on Aug 1, 2022 Github v4.0.2 downloads
DEB  Linux x86-64 39.4 MB weasis_4.0.2-1_amd64.deb
DEB  Linux arm-64 38.7 MB weasis_4.0.2-1_arm64.deb
DEB  Linux arm-32 38.4 MB weasis_4.0.2-1_armhf.deb
MSI  Windows x86-64 39.4 MB Weasis-4.0.2-x86-64.msi
PKG  macOS x86-64 51.0 MB Weasis-4.0.2-x86-64.pkg
RPM  Linux x86-64 53.9 MB weasis-4.0.2-1.x86_64.rpm
 
v4.0.1 publised on Jun 17, 2022 Github v4.0.1 downloads
DEB  Linux x86-64 39.3 MB weasis_4.0.1-1_amd64.deb
DEB  Linux arm-64 38.7 MB weasis_4.0.1-1_arm64.deb
DEB  Linux arm-32 38.4 MB weasis_4.0.1-1_armhf.deb
MSI  Windows x86-64 39.4 MB Weasis-4.0.1-x86-64.msi
PKG  macOS x86-64 51.0 MB Weasis-4.0.1-x86-64.pkg
RPM  Linux x86-64 53.8 MB weasis-4.0.1-1.x86_64.rpm
 
v4.0.0-rc publised on Apr 30, 2022 Github v4.0.0-rc downloads
DEB  Linux x86-64 38.9 MB weasis_4.0.0-1_amd64.deb
DEB  Linux arm-64 38.1 MB weasis_4.0.0-1_arm64.deb
DEB  Linux arm-32 37.9 MB weasis_4.0.0-1_armhf.deb
MSI  Windows x86-64 38.9 MB Weasis-4.0.0-x86-64.msi
PKG  macOS x86-64 50.5 MB Weasis-4.0.0-x86-64.pkg
RPM  Linux x86-64 53.4 MB weasis-4.0.0-1.x86_64.rpm
 
v3.8.1 publised on Feb 4, 2022 Github v3.8.1 downloads
DEB  Linux x86-64 39.3 MB weasis_3.8.1-1_amd64.deb
DEB  Linux arm-64 38.2 MB weasis_3.8.1-1_arm64.deb
DEB  Linux arm-32 38.7 MB weasis_3.8.1-1_armhf.deb
MSI  Windows x86-64 39.0 MB Weasis-3.8.1-x86-64.msi
PKG  macOS x86-64 51.4 MB Weasis-3.8.1-x86-64.pkg
RPM  Linux x86-64 55.1 MB weasis-3.8.1-1.x86_64.rpm
 
v3.8.0 publised on Dec 11, 2021 Github v3.8.0 downloads
DEB  Linux x86-64 39.3 MB weasis_3.8.0-1_amd64.deb
DEB  Linux arm-64 38.2 MB weasis_3.8.0-1_arm64.deb
DEB  Linux arm-32 38.7 MB weasis_3.8.0-1_armhf.deb
MSI  Windows x86-64 39.0 MB Weasis-3.8.0-x86-64.msi
PKG  macOS x86-64 51.4 MB Weasis-3.8.0-x86-64.pkg
RPM  Linux x86-64 55.1 MB weasis-3.8.0-1.x86_64.rpm
 
v3.7.1 publised on Jun 6, 2021 Github v3.7.1 downloads
DEB  Linux x86-64 38.0 MB weasis_3.7.1-1_amd64.deb
DEB  Linux arm-32 44.5 MB weasis_3.7.1-1_armhf.deb
MSI  Windows x86-64 38.4 MB Weasis-3.7.1-x86-64.msi
PKG  macOS x86-64 50.3 MB Weasis-3.7.1-x86-64.pkg
RPM  Linux x86-64 52.1 MB weasis-3.7.1-1.x86_64.rpm
 
v3.7.0 publised on Feb 6, 2021 Github v3.7.0 downloads
DEB  Linux x86-64 36.9 MB weasis_3.7.0-1_amd64.deb
MSI  Windows x86-64 37.3 MB Weasis-3.7.0-x86-64.msi
PKG  macOS x86-64 49.5 MB Weasis-3.7.0.pkg
RPM  Linux x86-64 51.1 MB weasis-3.7.0-1.x86_64.rpm
 
v3.6.2 publised on Aug 27, 2020 Github v3.6.2 downloads
DEB  Linux x86-64 34.9 MB weasis_3.6.2-1_amd64.deb
MSI  Windows x86-64 35.2 MB Weasis-3.6.2-x86-64.msi
MSI  Windows x86-32 43.4 MB Weasis-3.6.2-x86.msi
PKG  macOS x86-64 47.4 MB Weasis-3.6.2.pkg
RPM  Linux x86-64 48.6 MB weasis-3.6.2-1.x86_64.rpm
 
v3.6.1 publised on Jul 5, 2020 Github v3.6.1 downloads
DEB  Linux x86-64 39.0 MB weasis_3.6.1-1_amd64.deb
MSI  Windows x86-64 35.1 MB Weasis-3.6.1-x86-64.msi
MSI  Windows x86-32 36.7 MB Weasis-3.6.1-x86.msi
PKG  macOS x86-64 47.9 MB Weasis-3.6.1.pkg
RPM  Linux x86-64 55.2 MB weasis-3.6.1-1.x86_64.rpm
 
v3.6.0 publised on Mar 6, 2020 Github v3.6.0 downloads
DEB  Linux x86-64 40.3 MB weasis_3.6.0-1_amd64.deb
MSI  Windows x86-64 40.1 MB Weasis-3.6.0-x86-64.msi
MSI  Windows x86-32 41.2 MB Weasis-3.6.0-x86.msi
PKG  macOS x86-64 51.5 MB Weasis-3.6.0.pkg
RPM  Linux x86-64 57.3 MB weasis-3.6.0-1.x86_64.rpm
 
v3.5.4 publised on Nov 1, 2019 Github v3.5.4 downloads
DEB  Linux x86-64 38.7 MB weasis_3.5.4-1_amd64.deb
MSI  Windows x86-64 37.8 MB Weasis-3.5.4-x86-64.msi
MSI  Windows x86-32 39.7 MB Weasis-3.5.4-x86.msi
PKG  macOS x86-64 49.4 MB Weasis-3.5.4.pkg
RPM  Linux x86-64 55.8 MB weasis-3.5.4-1.x86_64.rpm
 
v3.5.3 publised on Aug 10, 2019 Github v3.5.3 downloads
DEB  Linux x86-64 38.3 MB weasis_3.5.3_amd64.deb
MSI  Windows x86-64 37.2 MB Weasis-3.5.3-x86-64.msi
MSI  Windows x86-32 39.0 MB Weasis-3.5.3-x86.msi
PKG  macOS x86-64 47.5 MB Weasis-3.5.3.pkg
RPM  Linux x86-64 55.3 MB weasis-3.5.3-1.x86_64.rpm

Embedding in dcm4chee

This page describes how installing Weasis to be the default web viewer of dcm4chee-arc-light web interface. See How to launch Weasis from any environments to integrate Weasis into your own user interface.

Weasis is launched from the dcm4chee administrative web interface with the weasis protocol, as shown in the pictures below.

dcm4chee-arc-light dcm4chee-arc-light

For a simpler and faster installation without server components, please follow these instructions; no need to consider the following points on this page. Otherwise if you need more advanced configurations then follow these steps:

  1. Install dcm4chee, if not already done (Installation with Docker is straightforward).

  2. Go here and download these following files:

    Warning

    Download issue: Some browsers (like Internet Explorer) may rename war files to zip. If so, use the Save As option when downloading and change the name back to war.

    • From weasis-pacs-connector folder:
      • [weasis-pacs-connector.war] Requires at least the version 7.1.2
    • From the folder with the latest version number (Optional if you want to run only the native version installed on the client system):
    • From the folder with the latest version number:
  3. Open the wildfly management console (at http://<your-host>:9990).

    • Select the “Deployments” tab
    • Add the .war files using the “Add” button (Choose Upload a new deployment or select Replace when the file already exists)
      Note

      Alternatively one may deploy .war files using JBoss Command Line Interface Console.

  4. Configure weasis-pacs-connector (This step is optional if you just want to keep the default configuration).
    The default configuration is stored in two files inside weasis-pacs-connector.war. To override the default configuration:

    • Download the current download>weasis-pacs-connector.properties and download>dicom-dcm4chee-arc.properties (configuration of the dcm4chee archive)
    • Edit the configuration as needed. For example, dcm4chee may be running on a different computer than Weasis, or the AE Title of dcm4chee may have been changed. If so, edit weasis-pacs-connector.properties or dicom-dcm4chee-arc.properties (Change pacs.host, pacs.port, and pacs.aet).
    • Copy weasis-pacs-connector.properties and dicom-dcm4chee-arc.properties into $WILDFLY_HOME/standalone/configuration (where $WILDFLY_HOME is the path of the running Wildfly).
      With the docker installation use the docker copy command ($ docker cp …)
      Tip

      Instead of copying the files into $WILDFLY_HOME/standalone/configuration, JBoss Command Line Interface Console can be used to override files in the war. Add the two configuration files with the deployment-overlay command:

      deployment-overlay add --name=dcm4chee-arc --deployments=weasis-pacs-connector.war --content=WEB-INF/classes/weasis-pacs-connector.properties=/tmp/weasis-pacs-connector.properties,WEB-INF/classes/dicom-dcm4chee-arc.properties=/tmp/dicom-dcm4chee-arc.properties --redeploy-affected
    • For applying the new configuration, from the management console “Disable” weasis-pacs-connector.war and then “Enable”
  5. To activate Weasis in the dcm4chee-arc-light user interface (see the matrix of the required versions in the table below): you need to add attributes by either editing docker-compose.env (from 5.22.0) or from the left menu Configuration > Devices > dcm4chee-arc > Extensions > Edit extension > Child Objects > Web Applications > DCM4CHEE (add &cdb to the URL if weasis.war has not been deployed on the server-side):

    • Configure the URL for having a view button for the patient or study level.
      • From dcm4chee-arc-light 5.10.2 to 5.19.0 the left menu Configuration > Devices > dcm4chee-arc > Extensions > Archive Device
      • From dcm4chee-arc-light 5.19.1 the left menu Configuration > Devices > dcm4chee-arc > Extensions > Edit extension > Child Objects > Web Applications > DCM4CHEE
      • From dcm4chee-arc-light 5.22.0 by editing docker-compose.env (It allows you to directly apply the properties when deploying, then the can be edited in the web portal). Note: the character ‘&’ must be escaped (e.g. IID_STUDY_URL=../../weasis-pacs-connector/weasis?studyUID={{studyUID}}\&access_token={{access_token}})
        Note

        URL parameters

        • access_token is necessary in secure mode (secured RESTful services) from dcm4chee-arc-light 5.15.1
        • _self avoids to open a new empty window in the web browser
        • cdb cdb parameter to override the URL of the Weasis web context to null (when you want only the native local version or when weasis.war has not be deployed with weasis-pacs-connector)
        • See also Invoke Image Display in dcm4chee
        Tip

        Absolute path: The values above starting by “../” are the default relative path when weasis-pacs-connector is installed in the same JBoss as dcm4chee. Otherwise replace the relative URL by an absolute value, ex: http://<your-host>:<port>/weasis-pacs-connector/...

    • InfoOptional Add other properties in the URL.
    • Refresh the web page and the view button should appear as in the screenshot above
    • To launch the viewer from the web portal, the client computer must have installed the Weasis package.
Mode dcm4chee version Configuration
Unsecured from 5.10.2 to 5.19.0 ../../weasis-pacs-connector/weasis?&patientID={}&target=_self
../../weasis-pacs-connector/weasis?&studyUID={}&target=_self
Unsecured* from 5.10.2 to 5.19.0 ../../weasis-pacs-connector/weasis?&patientID={}&cdb&target=_self
../../weasis-pacs-connector/weasis?&studyUID={}&cdb&target=_self
Secured from 5.15.1 to 5.19.0 ../../weasis-pacs-connector/weasis?&patientID={}&target=_self&access_token={}
../../weasis-pacs-connector/weasis?&studyUID={}&target=_self&access_token={}
Secured* from 5.15.1 to 5.19.0 ../../weasis-pacs-connector/weasis?&patientID={}&cdb&target=_self&access_token={}
../../weasis-pacs-connector/weasis?&studyUID={}&cdb&target=_self&access_token={}
Unsecured from 5.19.1 to 5.22.1 IID_PATIENT_URL=../../weasis-pacs-connector/weasis?&patientID={}&target=_self
IID_STUDY_URL=../../weasis-pacs-connector/weasis?&studyUID={}&target=_self
Unsecured* from 5.19.1 to 5.22.1 IID_PATIENT_URL=../../weasis-pacs-connector/weasis?&patientID={}&cdb&target=_self
IID_STUDY_URL=../../weasis-pacs-connector/weasis?&studyUID={}&cdb&target=_self
Secured from 5.19.1 to 5.22.1 IID_PATIENT_URL=../../weasis-pacs-connector/weasis?&patientID={}&target=_self&access_token={}
IID_STUDY_URL=../../weasis-pacs-connector/weasis?&studyUID={}&target=_self&access_token={}
Secured* from 5.19.1 to 5.22.1 IID_PATIENT_URL=../../weasis-pacs-connector/weasis?&patientID={}&cdb&target=_self&access_token={}
IID_STUDY_URL=../../weasis-pacs-connector/weasis?&studyUID={}&cdb&target=_self&access_token={}
Secured from 5.22.2 IID_PATIENT_URL=../../weasis-pacs-connector/weasis?patientID={{patientID}}&access_token={{access_token}}
IID_STUDY_URL=../../weasis-pacs-connector/weasis?studyUID={{studyUID}}&access_token={{access_token}}
IID_URL_TARGET=_self
Secured* from 5.22.2 IID_PATIENT_URL=../../weasis-pacs-connector/weasis?patientID={{patientID}}&cdb&access_token={{access_token}}
IID_STUDY_URL=../../weasis-pacs-connector/weasis?studyUID={{studyUID}}&cdb&access_token={{access_token}}
IID_URL_TARGET=_self

* Running only the local native version of Weasis (when not connected to a remote version - weasis.war -)

Weasis Web Protocol

The Weasis Protocol enables the launch of Weasis (starting from v3.6.0 ) in a web context using a specific URI scheme: weasis://commands.

How to Use the Weasis Protocol

To launch Weasis from various contexts:

  1. From a Web Page: Create a link that begins with weasis:// (see below How to build an URI).
    If certain web frameworks (e.g. WIKI) or contexts only support HTTP protocols, you can use a URL redirection starting with https://. A tool such as Weasis PACS Connector can assist with this.
  2. From the Command Line: Utilize the appropriate Weasis command from the terminal:
    start weasis://%24dicom%3Aget+-w+%22https%3A%2F%2Fnroduit.github.io%2Fdemo-archive%2FLumbar%2Fmf.xml%22
    xdg-open weasis://%24dicom%3Aget+-w+%22https%3A%2F%2Fnroduit.github.io%2Fdemo-archive%2FLumbar%2Fmf.xml%22
    open weasis://%24dicom%3Aget+-w+%22https%3A%2F%2Fnroduit.github.io%2Fdemo-archive%2FLumbar%2Fmf.xml%22

How to Build a URI

The weasis:// URI scheme allows you to launch Weasis directly from the system’s URI handler. By constructing the correct URI path, you can execute Weasis commands to load images or perform other actions.

Weasis PACS Connector can dynamically generate manifests (listing references for images to load) and build the required URI through an API. This tool also manages user preferences and other launch parameters.

If you’re not using the Weasis PACS Connector, you can build a URI manually by following these steps:

  1. Choose Commands: Select one or more commands to execute.
  2. Encode the Commands: Use a URL encoder to format the commands correctly for URI inclusion.
  3. Prefix the Commands: Add the weasis:// scheme at the beginning of the encoded command string to create the final URI.
Example: Loading a Remote Image
  1. Use $dicom:get to load an image from URL
    $dicom:get -r "https://nroduit.github.io/demo-archive/us-palette.dcm"
  2. Format the URI path with a URL encoder
    %24dicom%3Aget+-r+%22https%3A%2F%2Fnroduit.github.io%2Fdemo-archive%2Fus-palette.dcm%22
  3. Make the final URI by adding “weasis://” at the beginning Open the remote image
Tip

For loading multiple images, it’s recommended to use a manifest file that references all desired images instead of including each image individually in the URI. The easiest way to build this manifest dynamically is by using the Weasis PACS Connector. Alternatively, you can create the manifest manually following the provided instructions.

Examples to Load Images

If you use weasis-pacs-connector, please refer to Launch Weasis.

  • Use $dicom:get to load a static XML manifest containing direct links (without WADO server) Launch
    $dicom:get -w "https://nroduit.github.io/demo-archive/Lumbar/mf.xml"
  • Use $dicom:rs to load DICOM files with DICOMWeb RESTful services (see other examples) Launch
    $dicom:rs --url "https://demo.orthanc-server.com/dicom-web" -r "patientID=5Yp0E"
  • Use $dicom:get to load an image from URL and remove all the previous images if Weasis is already open Launch
    $dicom:close --all $dicom:get -r "https://nroduit.github.io/demo-archive/us-palette.dcm"
  • Use $dicom:get to load multiple local folders and a remote image Launch
    $dicom:get -l "D:/DICOM/Overlay" -l "D:/DICOM/Shutter" -r "https://nroduit.github.io/demo-archive/us-palette.dcm"
  • Use $image:get to load a non DICOM image Launch
    $image:get -u "https://user-images.githubusercontent.com/993975/59107662-6c9ed300-8939-11e9-83ee-28f2725f4ae1.jpg"

Modify the Launch Parameters

The command for modifying the configuration at launch is $weasis:config which can have different arguments:

  • cdb is the Weasis web context (The URL of weasis.war). If the value is null, the weasis version installed from the native installer is used. In the weasis-pacs-connector configuration, the default value is defined by weasis.base.url.
  • cdb-ext is the extension web context of Weasis (The URL of weasis-ext.war containing additionnal plugins). In the weasis-pacs-connector configuration, the default value is defined by weasis.ext.url.
  • arg is an argument for the launcher. The value must start by $, like arg="$dicom:close –all" (Note: the value can also be directly in the base URI, outside $weasis:config). Single-valued argument but can be specified multiple times.
  • pro is a property for the launcher containing a key and a value separate by a space. Single-valued property but can be specified multiple times.
  • auth is the web authorization parameter
  • wcfg is the URL the remote Weasis configuration service.

Here are some examples that modify the launcher properties without using weasis-pacs-connector:

  • Configuration for launching Weasis Dicomizer Launch
    $weasis:config pro="felix.extended.config.properties file:conf/dicomizer.json" pro="gosh.port 17181"
  • Change the user, by default is the one of the current system session. The local preferences are associated to a user. Launch
    $weasis:config pro="weasis.user user2"

Building Weasis

These instructions guide you through building Weasis directly from its GitHub repository. For IDE-based builds, refer to the Weasis plugin development guidelines.

Prerequisites

  1. JDK 23 or higher
  2. Maven 3.6.3 or higher
    If your computer is behind a proxy server, refer to the Maven proxy configuration guide.
  3. Git

Getting the Source Code

In order to clone the repository, install Git and either use a graphical client or run the following command in a terminal:

git clone https://github.com/nroduit/Weasis.git

Building All Plugins

  • Navigate to the root directory of the cloned Weasis repository, compile and install all plugins into the local Maven repository:

    mvn clean install

  • Package weasis-native.zip (located in target/native-dist/), since Version4.0.0 :

    mvn -P compressXZ -f weasis-distributions clean package
    Tip

    -P compressXZ: Option for compressing the packages in xz, only from Weasis 3.6.0. The compression pack200 is not supported anymore (removed from Java 14), before 3.6.0 the profile was -P pack200.

    Tip

    -P purgeI18nPackage: Option to delete the translation package in the local maven repository (active by default). To disable this option, add - before the profile:

    mvn -P compressXZ,-purgeI18nPackage -f weasis-distributions clean package
    Warning

    For production, the version must not include SNAPSHOT (as packages with a SNAPSHOT are always downloaded, not cached). To remove SNAPASHOT or create your own release (use a specific name to prevent package conflicts in the cache), update the changelist property. From the Weasis root folder, execute:

    mvn -Dchangelist=-mybuild-beta clean install
    mvn -Dchangelist=-mybuild-beta -P compressXZ -f weasis-distributions clean package

Building native binaries and installers

Starting with Version4.0.0, the native installer has fully replaced the portable and Java WebStart distributions.

The official build process is executed via GitHub Actions using GitHub-hosted runners across Linux, macOS, and Windows.

However, you can also build the native binaries and installer locally using the package-weasis.sh script. This process is not guaranteed to work on all systems, as it requires proper configuration of multiple tools. Refer to the jpackage prerequisites for more details.

  • Obtain the weasis-native.zip file, extract the archive, and navigate to the root folder in a Bash prompt.
  • Run the following command to build the native binaries and installer:
    ./build/script/package-weasis.sh --jdk "/home/.jdks/openjdk-23"
Note
  • Replace --jdk with the path to your local JDK installation.
  • To generate only the native binaries (without creating an installer), include the --no-installer flag.
  • For additional command options, run:
    ./build/script/package-weasis.sh --help
Tip

On Windows the bash script must be executed with Git Bash or Cygwin. Avoid having spaces in the input and output paths.

Guidelines

Weasis Plugin Development

This page describes the necessary configurations to be able to debug Weasis using an IDE. For developers who want to create new plugins, you can visit How to build and install a plugin.

We recommend the use of IntelliJ IDEA because the following instructions are based on it. Nevertheless, it is possible to use other IDEs by configuring weasis-launcher with similar instructions described in Add a launcher.

Prerequisites

  1. Install IntelliJ IDEA (Community or Ultimate Edition 2024.3 or higher)
  2. Use JDK 23 or higher and set the language level to SDK Default in File > Project Structure… >.
    Required Maven version is 3.6.3 or higher.
  3. In File > Settings… > Plugins install google-java-format plugin from Marketplace and enable it from google-java-format Settings

Code style and convention

Weasis uses google-java-format as coding conventions. The format can be applied by Maven through the Spotless plugin or from the IDE (by importing the IntelliJ Java Google Style file). Formatting code with an IDE is not 100% compatible with Spotless, so it is better to use the latter before submitting new commits. This guarantees identical code formatting regardless of the system or code editor used.

  • From Maven command: mvn spotless:apply
  • From the Maven panel Maven Spotless Maven Spotless

Getting the source and building Weasis

  • Getting the Source
    • For external Git client, see Building Weasis.
    • From IntelliJ IDEA: New > Project from Version Control…
      • In the Get from Version Control dialog, select the menu Repository URL and enter the following URL: https://github.com/nroduit/Weasis.git (public repository)
  • Building Weasis plugins
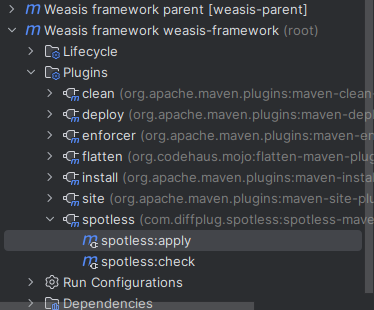
    • In the maven panel, select clean/install in Lifecycle of weasis-framework (root) to compile and to install all the plugins in the local Maven repository.
Tip
  • It is possible to use a JVM Option (e.g. -Dweasis.arch=linux-x86-64) to limit the build of native plugins only to the architecture of the current system (do not use this option when building the distribution).
  • See also building the final Weasis Distributions

Add a launcher

For running or debugging Weasis, you need to create a launcher:

  • Open Run > Edit Configurations…

  • Create a new Application

    • Select weasis-launcher as a module (field starting by -cp)
    • Main Class: browse org.weasis.launcher.AppLauncher
    • Click on Modify Options
      • Select Add dependencies with “Provided” scope to classpath
      • Select Do not build before run
      • Select Add VM Options and enter -Xms64m -Xmx768m -Dgosh.port=17179
    • Working Directory: remove the current value and add %MODULE_WORKING_DIR% from the Insert Macros button Launcher Configuration Launcher Configuration
      Note

      As the default build task has been removed it is necessary to apply the Maven command install on modules with modified code before launching the Run or Debug mode.
      Keeping the build task and delegating the build to Maven does not seem configurable for a multi-module project, see this issue.

  • Examples of launching parameters by entering values in the Program arguments text box

    • Loading DICOM files from a local path:
      $dicom:get -l \"D:\images test\dicom\"
      Note

      Some command interpreters need to escape the quotes or double quotes required for paths or URLs. This is the case with IntelliJ IDEA or Eclipse.
      For more commands at startup see also Weasis commands.

      Warning

      In Eclipse launcher parameters, ‘&’ within URLs needs to be escaped with a backslash.

  • Examples of other VM options for overriding the default Preferences

    • Removing the possibility of exporting DICOM: -Dweasis.export.dicom=false
    • Defines a new user (for getting specific preferences): -Dweasis.user=user1
    • Examples with specific configuration files:
      • For launching Weasis Dicomizer: -Dfelix.extended.config.properties=file:target/conf/dicomizer.json
      • Configuration from an URL: -Dfelix.extended.config.properties=https://mysite.com/weasis/conf/config.json
        Note

        felix.config.properties defines the location of base.json (the OSGI configuration and the list of plugins to install/start)
        felix.extended.config.properties defines the location of a json file (extends/overrides base.json)

Internationalization

Translation files are hosted and managed on the Transifex website. Get an account and help to translate to your language! If your language is missing, just head over to Transifex and request a new language.

Warning

Text length: The translations for many languages frequently exceed the length of the corresponding English source. It could be a problem for the layout of graphical components (e.g. buttons). Some elements have a character limit on the translation tool.

Tip

Special characters: Some characters representing values (%d, %s), newline (\n) and HTML tags must not be translated. For other translating recommendations, see Transifex help
For special words or particular contexts look at the “Instructions” text box (gives explanations or definitions).

Building Weasis-i18n

weasis-i18n is the internationalization project (i18n) of Weasis. As a separate project, it can have its own release cycle. The OSGi fragments of plugins contain only the translation files which are merged during runtime to the matching module of the application.

To obtain daily built packages, see this page.

Note

That means the translation packages can be deployed at any time, it does not need to follow the Weasis life cycle. With remote packages, the plugin translation will be updated by Weasis only if the timestamp number has changed. This timestamp is set during the build phase described below.

Info

Additional projects to obtain a full translation of Weasis:
The java-swing-dialogs translations must be updated manually in the weasis-launcher module and docking-frames translations must be packaged witin the library.

Prerequisites

  1. JDK 11 or higher
  2. Maven 3 or higher
    If your computer is behind a proxy server, configure maven.
  3. Git or directly download the source code from GitHub

Getting the Source

To clone the repository, first install GIT and either clone using a graphical GIT client (such as Tortoise Git) or directly from the command line using the command:

$ git clone https://github.com/nroduit/weasis-i18n.git

Build the distribution

Go in the weasis-i18n directory, Compile and install all the plugins in the local Maven repository

$ mvn clean install -Dtransifex.token="<your-token>"

All the APIs require to be authenticated. So the value “your-token” must be replaced by your generate token, see how to get this token on Transifex.

Command if you are behind a proxy server:

$ mvn clean install -DproxySet=true -DproxyHost="host" -DproxyPort="port" -Dtransifex.token="<your-token>"

Info

The distribution files are located in the weasis-i18n-dist/target/dist folder.

Apply the translations

The translation package can be built manually as described below or it is automatically built every 24 hours and can be downloaded from here. When Building Weasis, the last package is downloaded automatically.

  • In order to update Weasis with new translations, unzip weasis-i18n.zip and either:
    • Pass the weasis.i18n location into the launch command:
      $weasis:config pro="weasis.i18n <your-uri>"
      $weasis:config pro="weasis.i18n file:/home/weasis-i18n-dist-4.0.0-SNAPSHOT"
      $weasis:config pro="weasis.i18n https://<your-domain>/weasis-i18n-dist-4.0.0"
    • Replace the files in the “bundle-i18n” folder where Weasis is installed (not possible when Weasis is distributed from an application store or the Mac signed package).
Note

weasis-launcher-i18n cannot be updated dynamically as the launcher is not an OSGi module. It must be imported manually into the Weasis source (weasis-launcher).

Tip