MIP Viewer
Maximum Intensity Projection (MIP)
MIP collapses a small stack of contiguous slices — a slab — into a single image by keeping the brightest voxel encountered along each ray through the slab. The technique is widely used to display high-intensity structures that would otherwise be split across many slices, such as contrast-enhanced vessels (CT/MR angiography), bones, or bright pulmonary nodules. MinIP (minimum) and Mean IP (average) projections are also available — useful for airways, low-attenuation lesions, or smoother integrated views.
Since Version4.7.0, MIP is no longer a standalone window. It is integrated directly into the DICOM 2D viewer, with full synchronization and a slab-geometry overlay shared with linked views.
MIP is also available in the other 3D-capable viewers, each with its own configuration:
- MPR viewer — MIP can be enabled per view via the view configuration button, so the slab projection works on any reconstruction plane (axial / coronal / sagittal / oblique).
- 3D Volume Renderer — offers MIP as a volume rendering type.
Activating MIP in the 2D viewer
Enable the projection from in the Basic 3D toolbar of the DICOM 2D viewer.
Note
The button is grayed out when the current series has fewer than 5 images — the minimum needed for a meaningful projection.
Tip
If the series is a multi-phase 4D acquisition (for example a cardiac CT with several temporal phases), Weasis automatically splits it into individual phase sub-series when 2–7 phases are detected. For series with 8 or more phases, a confirmation dialog is shown first. Open any resulting phase sub-series to use it in MIP mode — see 4D Series Sub-Series Splitting.
Once active, MIP in the 2D viewer provides:
- Full synchronization — the slab stays aligned with the current slice position and follows any view synchronization you have configured.
- Slab cross-lines — when another loaded series shares the same Frame of Reference and is shown in a different orientation, the standard cross-lines on that series are extended to show both edges of the slab instead of just the current slice position. The slab extent is therefore visible at a glance from a complementary plane.
- Per-view indicator — once MIP is active on a view, the icon appears in the top-right corner of that view. Clicking it opens the same MIP options as the toolbar button, so you can tweak settings per view without leaving the layout.
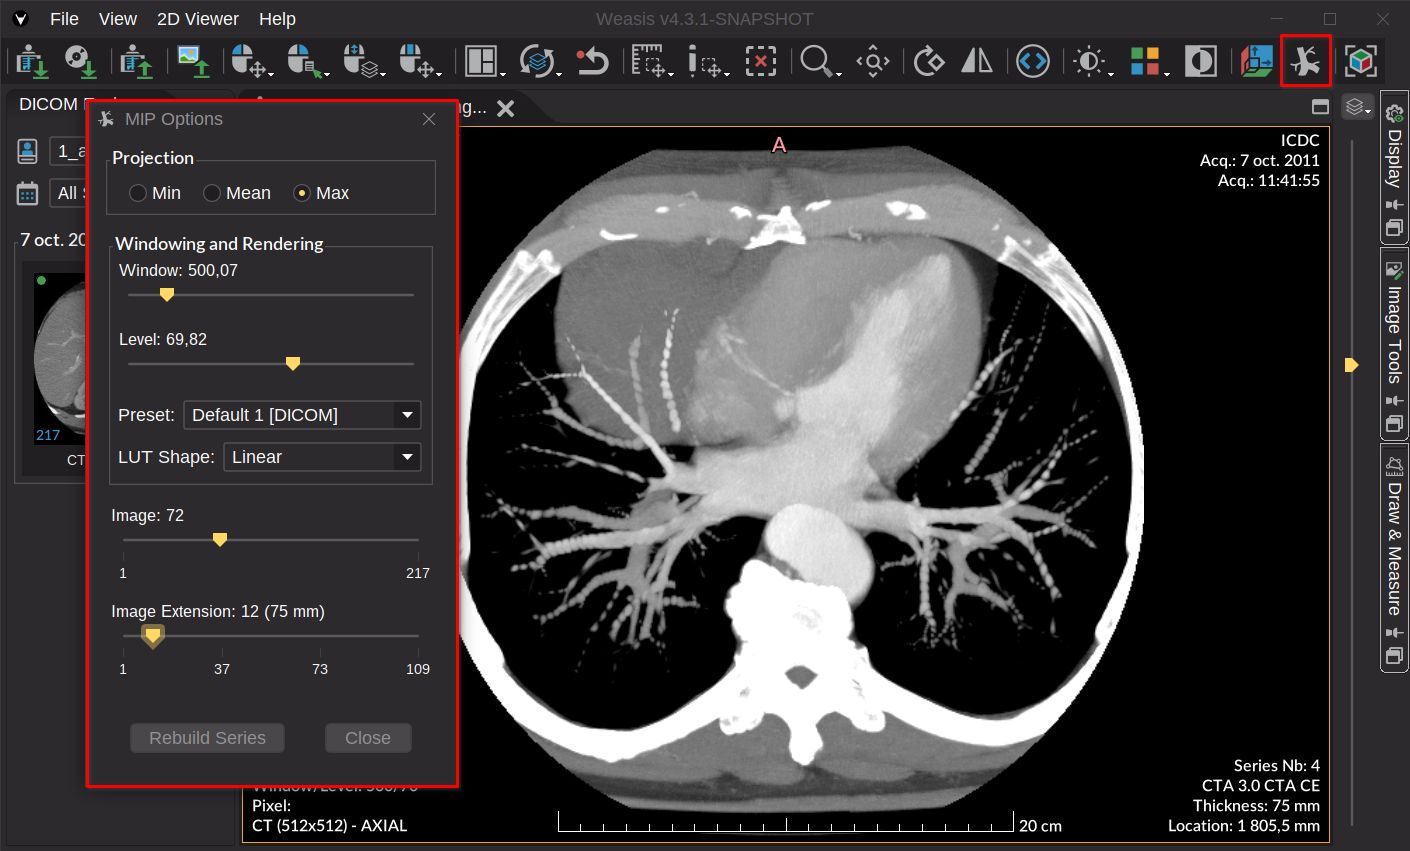
MIP options
The MIP options panel can be opened from either of two places:
- The button in the Basic 3D toolbar — applies to the currently selected view.
- The indicator in the top-right corner of any view that already has MIP active.
Note
Annotations and measurements can be added on a MIP-projected image, but they are not persistent when scrolling: each annotation is tied to the exact slice position on which it was drawn, and disappears as soon as you navigate away. To keep annotations attached to a specific MIP configuration, build a new series from those options.
Projection
The projection type controls how each pixel of the output is computed across the slab:
- None — no projection; display the original image.
- Min — Minimum Intensity Projection.
- Mean — Mean Intensity Projection.
- Max — Maximum Intensity Projection.
Switching from None to any of the projection types initializes the slab thickness to 2 slices (2 slices before and 2 slices after the current one).
MIP thickness
Defines the extent of the slab used for the projection — expressed as a number of slices before and after the current one (e.g. a value of 3 means 3 slices on each side of the current slice, 7 slices total in the slab).
The dropdown shows suggested values, with the corresponding physical thickness in millimeters shown in parentheses when the series is spatially calibrated (e.g. 5 (3.5 mm)). The last entry, Custom thickness, lets you type any value manually.
Build a new series
Builds a new MIP series from the current options — every slice of the source series is reprojected with the chosen projection type and slab thickness, and the result is stored as a standalone series. The new series is added to the DICOM Explorer and can be exported like any other series. Annotations drawn on the new series are persistent since they are no longer tied to a live slab calculation.