Printing images
Weasis can print images two ways:
- Standard printer — sends a regular page to any printer configured on your operating system (laser, inkjet, PDF writer, …). Used for paper reports, slide handouts, or PDF export.
- DICOM Print — sends the images directly to a DICOM film printer over the network, using the DICOM Print Management protocol. Used in radiology departments that still print films for clinical use.
Both modes operate on the current layout — the page is built from the views currently visible in the active tab. The first step is therefore to prepare the layout exactly the way you want it on paper or film.
Preparing the image selection
If you need more than one image per page, pick a layout from the layouts dropdown in the toolbar (1).
Note
The layout list is computed dynamically from the current window size — resizing or maximizing the Weasis window changes the layouts on offer. On a panoramic monitor you can, for example, pick a wide horizontal layout and then print in landscape orientation.
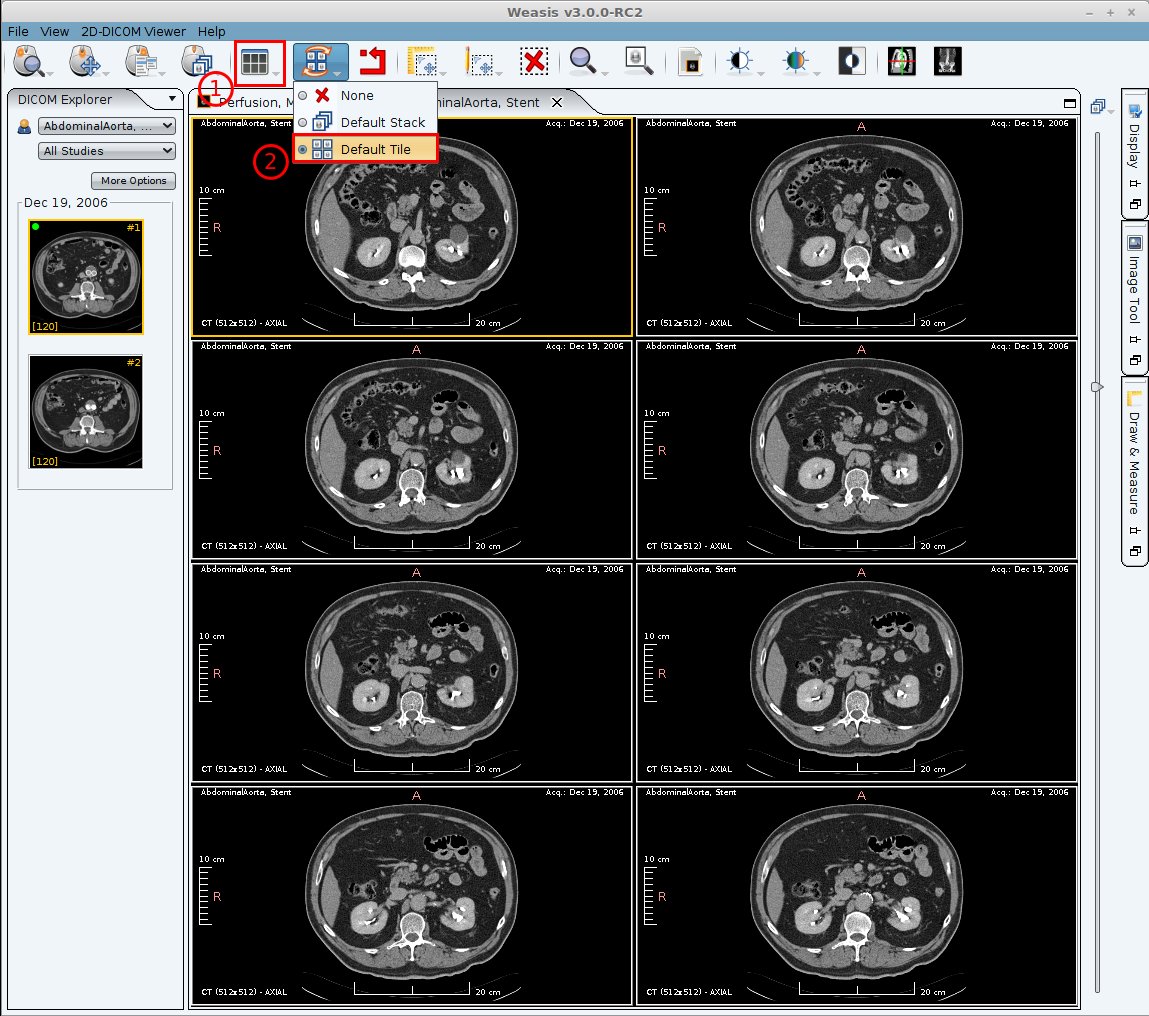
To fill the layout with images, choose a synchronization mode (2):
- Default Tile — every view is filled automatically with consecutive images of the same series (the first view shows image n, the next shows n+1, and so on).
- Default Stack — drag and drop a series into each view independently, then scroll each view to the image you want printed.
Choosing a print mode
Standard Printer
Open File > Print > Print 2D viewer layout (P) from the main menu.
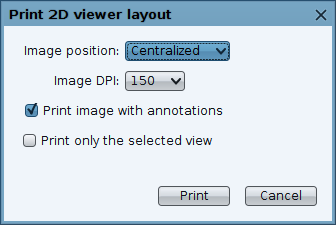
Print options:
- Image position — where each image is placed inside its page cell (centered, fit, etc.).
- Image DPI — print resolution in dots per inch (default: 150). Higher DPI means finer detail and a larger file sent to the printer.
- Print image with annotations — when checked, the annotations and graphic objects defined in the Display panel are printed on top of the image.
- Print only the selected view — when checked, only the view with the orange focus border is printed. When unchecked, every view of the current layout is printed.
DICOM Print
Open File > Print > DICOM Print from the main menu.
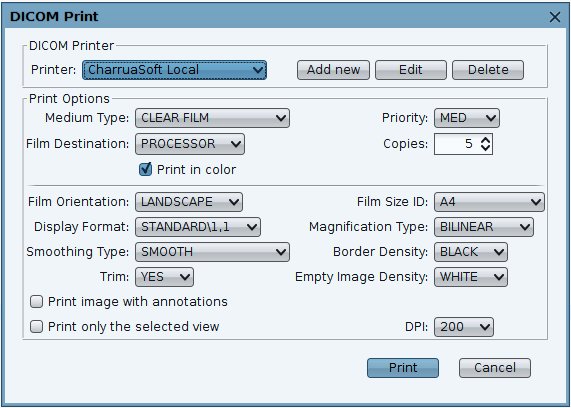
The DICOM Print dialog lets you manage several DICOM printer configurations (each carrying its own AE title, host, port, and film parameters). The print parameters mirror the Standard Printer ones above — for the protocol-level specifics, see the DICOM Print Management Service chapter of the standard.
Note
DICOM printer configurations can be deployed centrally so every client gets the same printer list — see How to add DICOM nodes or DICOM printers at the server side.