Build DICOM KO and Presentation States
Two annotation objects authored from the viewer
Weasis can author two standard DICOM annotation objects directly from the viewer:
- Key Object Selection (KO) — a list of “key images” inside a series. Use it to flag the slices that matter for a finding so a reader can scroll only through those.
- Presentation State (PR / GSPS) — drawings, measurements, and other graphic overlays that reference the source images. Use it to share findings across systems without baking annotations into the pixels.
Both objects can be saved as proper DICOM files and sent to a PACS through the standard DICOM Export workflow, so they travel with the study and can be re-applied by any DICOM-compatible viewer.
Key Object Selection (KO)
To make the KO controls visible, enable the Key Object Selection toolbar from View > Toolbars > Key Object Selection Toolbar in the main menu.
When a DICOM KO is loaded with the series, it appears in the explorer menu (1) and can also be picked from the icon on the right side of the view (6). KO objects created in Weasis behave the same way.
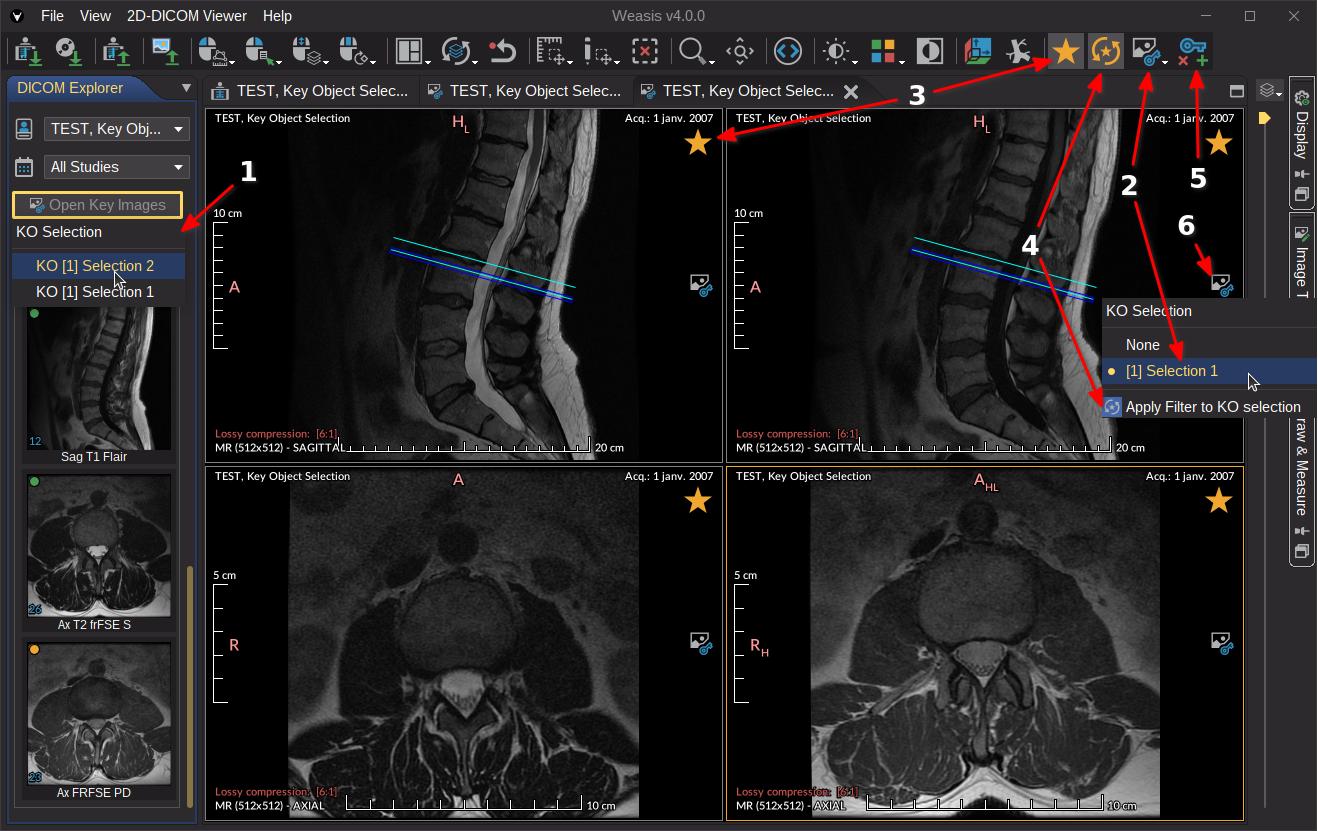
Actions available in the KO toolbar:
- Apply a KO (2) — select which KO drives the current view.
- Mark / unmark a key image (3) — click the star icon, or press K (default — customizable since v4.7.0 in Keyboard Shortcuts) to add the current image to the active KO, or create a new one if none exists yet.
- Filter to key images only (4) — when active, scrolling skips every image that is not part of the selected KO, so you see only the flagged slices.
- Create / delete a KO (5) — start a new KO (optionally seeded from an existing one) or delete a KO. Only KOs created by Weasis can be deleted.
Presentation State (PR or GSPS)
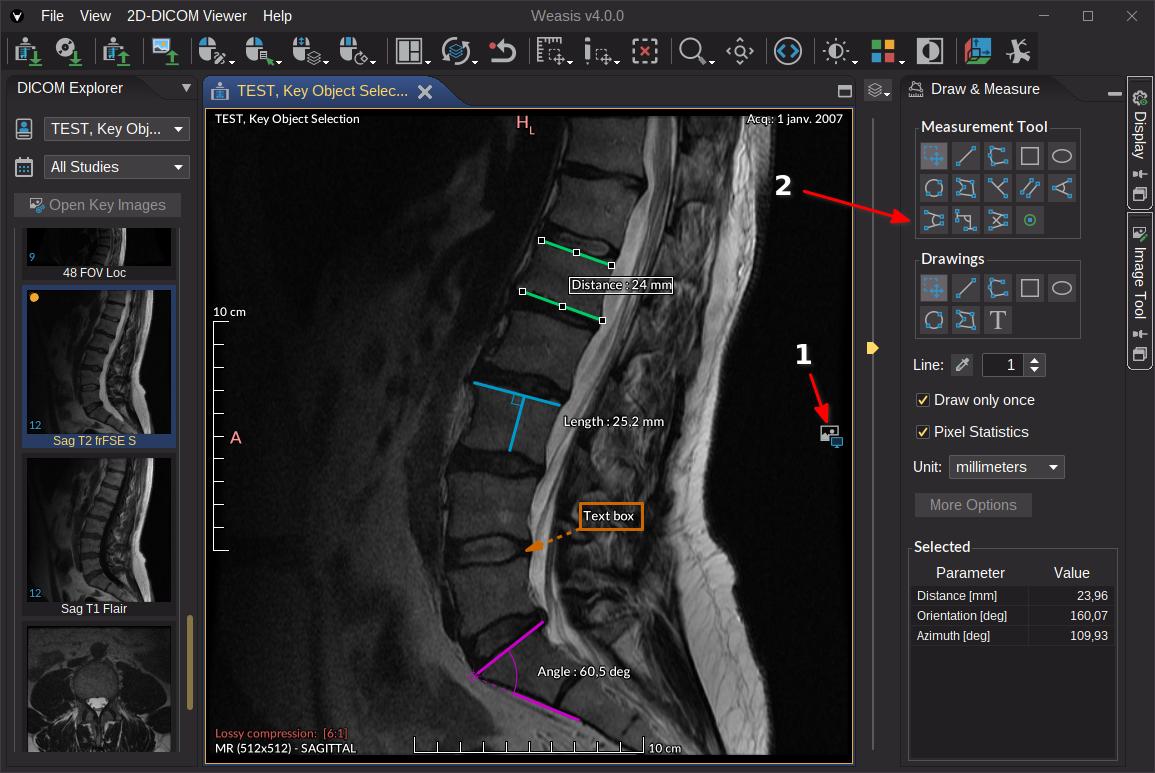
- Apply a PR loaded from a DICOM file (1) — PRs are not applied automatically since v2.6.0; click the dedicated icon (2) above the image to apply one. To have the most recent PR applied by default, enable Apply by default the most recent Presentation State under File > Preferences (Alt + P) (also configurable through the default preferences).
- Create a new PR — any drawing or measurement (see Draw & Measure) can be exported into a DICOM Presentation State. Image-rendering parameters (zoom, calibration, window/level, LUT…) are not yet included in the exported PR.
Exporting Key Object Selection or Presentation State
Newly created KO and PR objects are exported through the standard DICOM Export dialog — open it from the toolbar icon or from File > Export > DICOM.
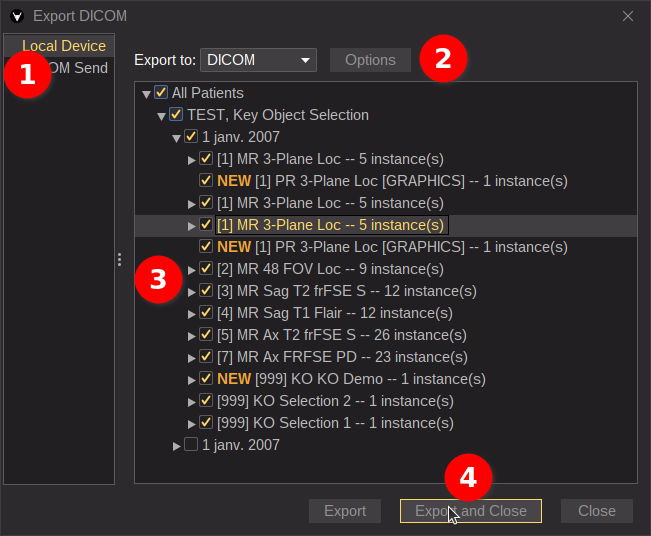
- Pick the export destination — Local Device, DICOM Send, or CD/DVD Image (see DICOM Export for the per-destination options).
- Choose the export options. Series created inside Weasis (including new KO and PR objects) are flagged NEW in the selection tree.
- Select the patient(s), study, series, or individual instances to export.
- Click Export to write or transfer the files, then close the window.