DICOM Import
How to import DICOM files
Weasis can open DICOM files from various ways and sources: drag and drop, local device, DICOM ZIP, DICOM CD/DVD, DICOM Query/Retrieve, and from commands locally or remotely.
Note
An popup error message is displayed when DICOM files cannot be read (from v4.3.0) or when a network error occurs. In the latter case a message asking to download again the missing files.
From the system file explorer
Drag and drop
Files or folders selected from the system file explorer can be opened by dragging and dropping into the central area of Weasis.
- Empty central panel: Any files that ca be open by one of the viewers (e.g., standard images such as TIFF, PNG, JPEG…)
- DICOM Explorer and DICOM viewers (SR, AU, MPR, 2D and 3D) in the central panel: Only DICOM files. Opens the default viewer according to the files.
File association
Dicom files can be opened by double-clicking them from the system file explorer.
On Windows only the files with the extension “.dcm” are associated with Weasis. With other systems DICOM files without extension are associated with Weasis.
Note
From Weasis menu or toolbar
From the main menu, open File > Import > DICOM or from the first import button in the toolbar. ![]()
![]()
In order to import DICOM CD/ DVD, go to the main menu, open File > Import > DICOM CD or from the second import button in the toolbar.
Local Device
- Files and/or folders: list of selected items or unique path
- Search recursively: when this option is activated the import takes into account the subdirectories
- Open in new tab: behavior to automatically open the images of a patient when loading DICOM files
DICOM ZIP
- Select: browse a DICOM zip file. When the archive file is encrypted, a password prompt is displayed.
- Open in new tab: behavior to automatically open the images of a patient when loading DICOM files
DICOMDIR
It may be from a DICOM CD/DVD or a folder containing a DICOMDIR
- Path: browse a folder containing a DICOMDIR
- Detect CD-ROM: try to load a DICOM CD/DVD
- Copy images into the local temporary directory: useful for slow reading devices like CD-ROM
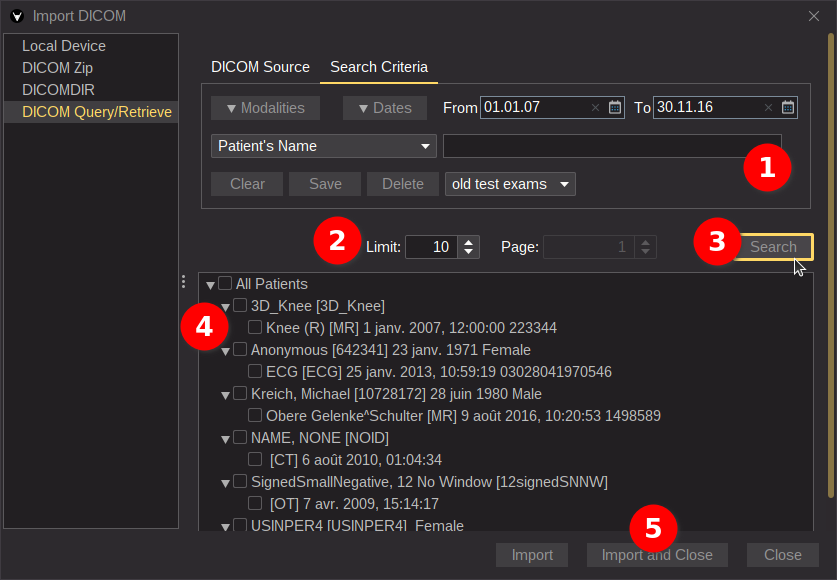
DICOM Query/Retrieve
- On DICOM Source tab:


- Archive: select the archive to query
- With DICOM nodes: classic DIMSE C-Find with C-Move, C-Get or WADO-URI for retrieving DICOM files
- With DICOMWeb nodes: QIDO and WADO-RS for retrieving DICOM files (no other options are required)
- Retrieve (only with DICOM archive): the protocol to retrieve the images
- C-MOVE: the classic DIMSE protocol (accepts all sop classes, not recommended for WEB)
- C-GET: transfer syntaxes are negotiated by each sop class according to a configuration file
- WADO-URI: required a WADO server (C-Find + WADO retrieve)
- Calling Node (only with DICOM archive): select the adapted calling DICOM node
- More options: allows you to open the preferences to configure the DICOM nodes
- Archive: select the archive to query
- On Search Criteria tab:


- Select a pre-registered item (bottom right of the Search Criteria panel) or Fill the search criteria. Criteria can be saved and reused later, since Version4.1.0 the item selected in the combo box is automatically applied the next time this window is opened (the default value is Empty).
- Adjust the limit to the maximum number of exams in the response. Set the limit to 0 to avoid this constraint. For DICOMWeb the limit is the number of elements on a page, and you can go to the next page with the spinner buttons.
- Click on Search
- Select the exams you want to import
- Start importing and close the window
Note
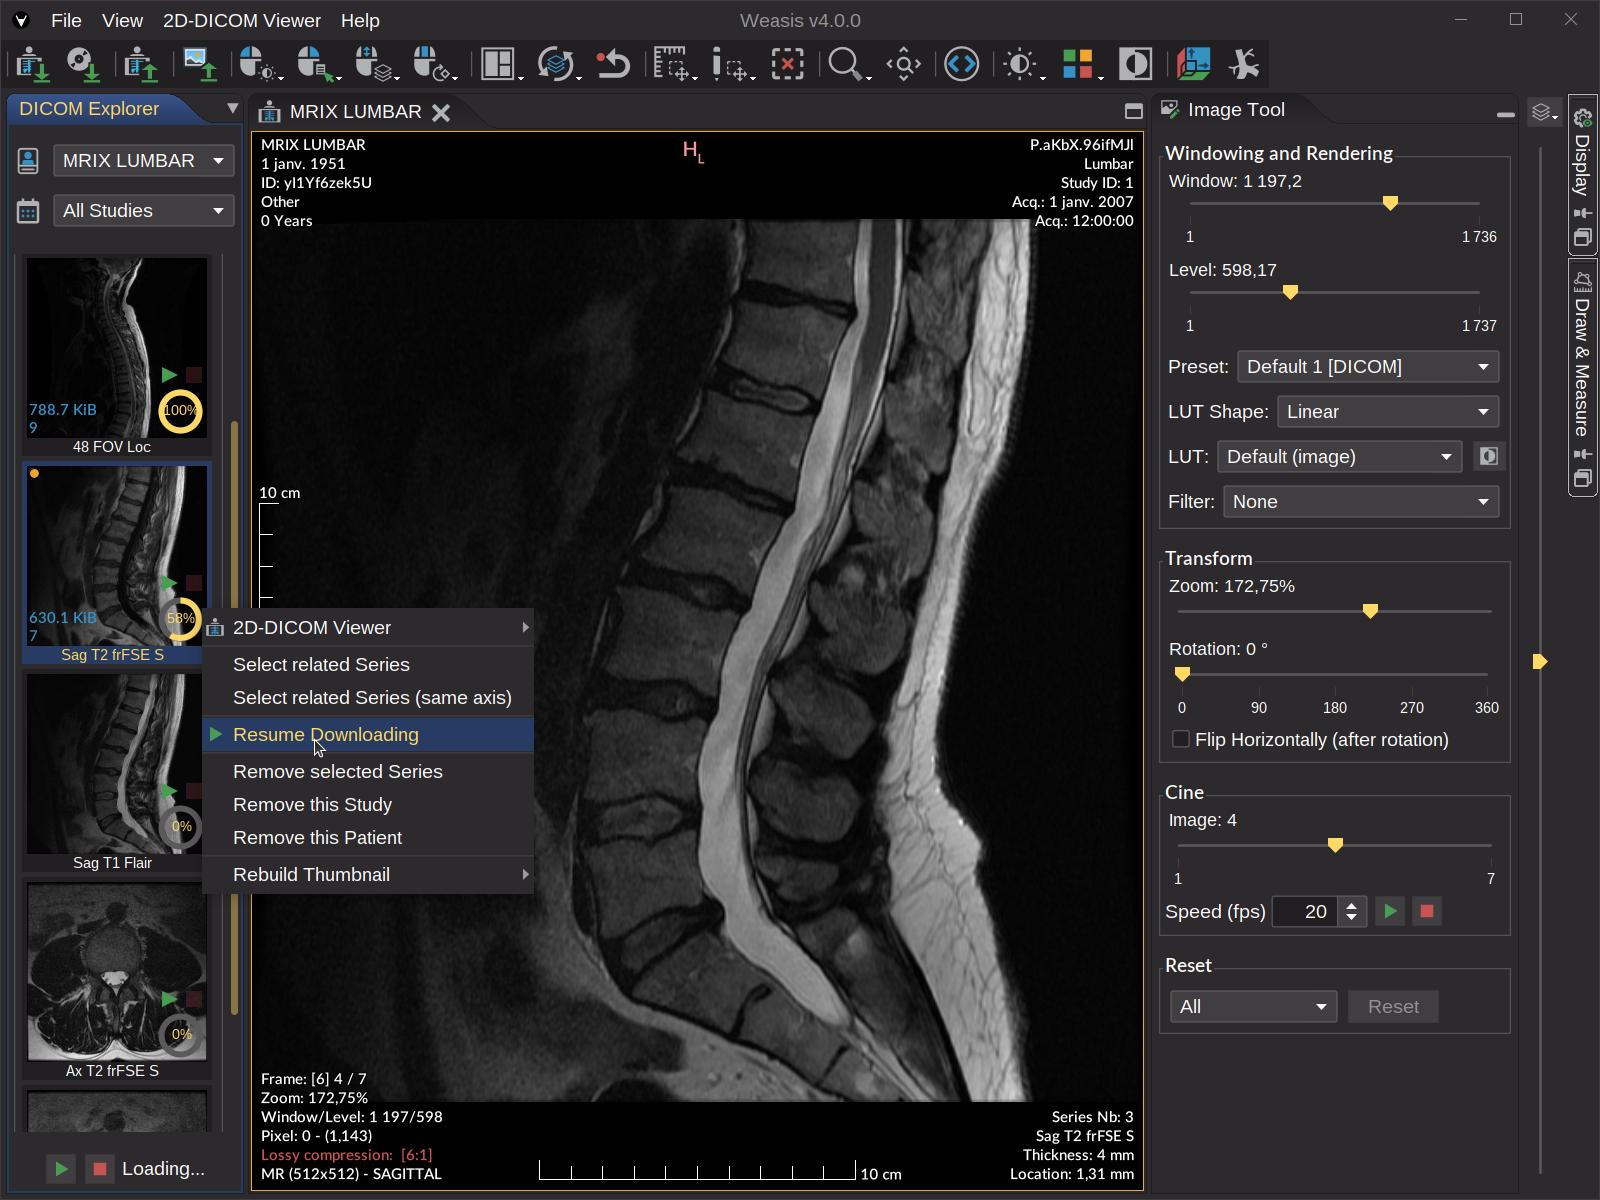
The progression of downloaded images for a series and the ability to pause the download of a series is only possible with DICOMWeb nodes and with the combination (DICOM C-FIND + WADO-URI).

 Resuming the download of a series by clicking on the green play button or from the contextual menu.
Tip
When a query is too long, try to click on the Clear button in Search Criteria to cancel the request.
With a DICOMWeb node, a login from a web browser can be required (e.g., login to your Google account). If something goes wrong, Weasis may freeze for at least 1 minute waiting for the authorization code.
From commands
See this page