Spatial Calibration
How to change the spatial calibration
Spatial calibration is the link between a pixel and a real-world length. With a valid calibration, every measurement (distance, area, angle) reflects actual millimeters or centimeters, and the real-world zoom can display images at the same size as the original objects.
For DICOM images, the calibration is normally derived from the standard attributes (Pixel Spacing for cross-sectional acquisitions, Imager Pixel Spacing for projection radiography). The 2D viewer indicates how the calibration was obtained — see the calibration type label shown above the ruler.
When no calibration is available — or when you want to override an existing one — you can apply a manual calibration as long as the image contains a reference object of known size (a ruler, a fiducial, a calibration phantom, or any landmark whose physical length you know).
Manual calibration procedure
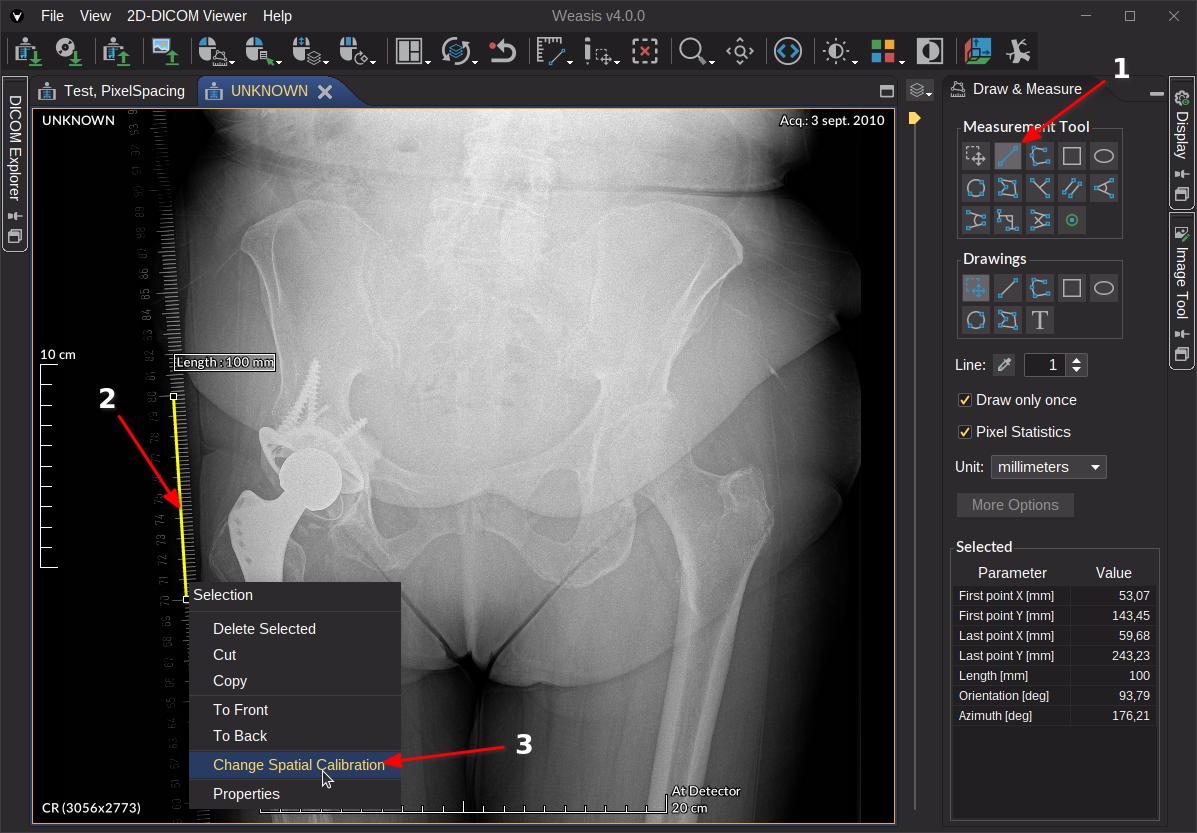
- Pick the Line tool from the Measurement tools.
- Draw a line along an object whose real-world length you know.
- Right-click the line and choose Manual Calibration.
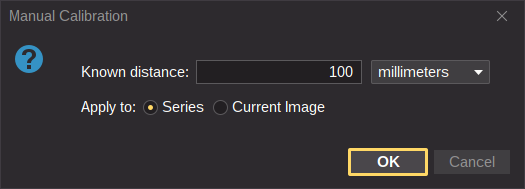
- Enter the known distance (with its unit) in the dialog and confirm.
Note
The Manual Calibration dialog can apply the new scale either to the current image only or to every image in the series. Pick the right scope for your dataset (a series with consistent geometry is normally calibrated as a whole).
Info
Once the image is calibrated, all measurement tools report values in the chosen unit and the real-world zoom renders the image at its physical size. The manual calibration is kept in memory for the current session but is not currently written back into the DICOM file.
Changing spatial calibration with Weasis 1.1.3
The procedure shown below was recorded on an older version of Weasis; the underlying workflow is unchanged.